

华为无线添加AP类型
添加AP设备类型背景信息当有新版本AP接入时,以前用户需要同步升级AC版本。而现网升级AC版本时,将会影响所有AP,如果AC同时还承担着有线侧业务,AC的升级还会影响有线侧用户。对于这种场景,仅需要在AC上配置支持新版本AP类型功能,即可以使得AC支持新款型AP类型而不用立即升级AC版本。
在AC上配置支持新版本AP类型的方式有2种:自动导入AP类型和手动配置AP类型。
一般不建议用户通过ap-type命令手工配置AP类型,如果一定需要配置,请确保type-id和type-description的对应关系配置正确,否则将导致AP接入失败。type-id和type-description的对应关系可以下载WLAN AP版本配套和形态速查表查看页签“AP类型名称与索引对应关系”。
在AC上配置新版本的AP类型时,不支持添加中心AP和配套的RU。
操作步骤1234567执行命令system-view,进入系统视图。执行命令wlan,进入WLAN视图。执行命令display ap-type undefined record,查看由于AC不支持导致AP接入失败的AP类型列表。执行命令auto c ...
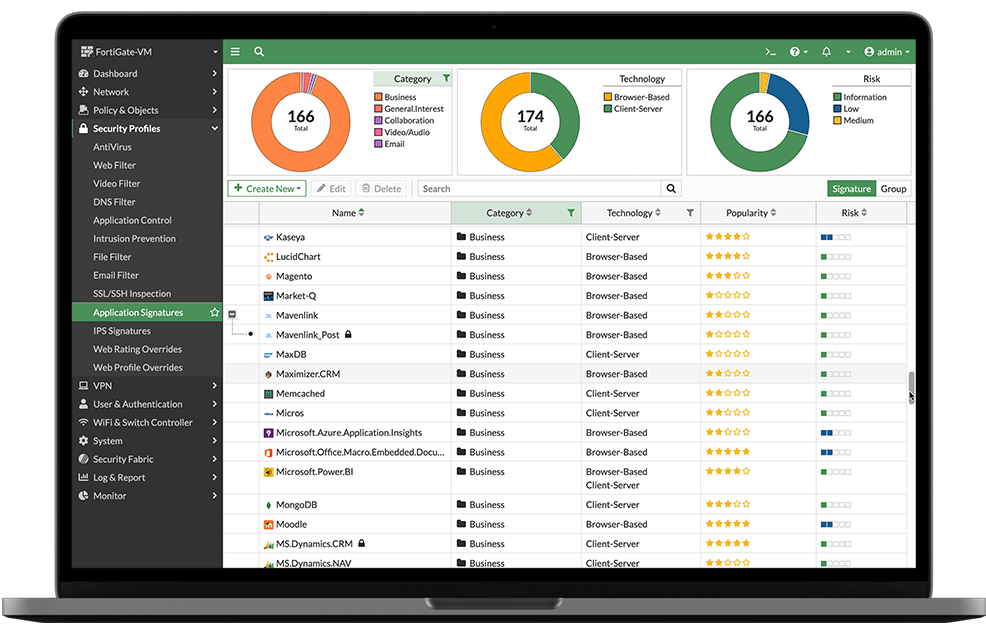
飞塔防火墙debug排错
Debug Flow介绍Debug Flow 通常用于定位调试穿过或访问FortiGate数据流的处理过程,对于定位问题有很大的帮助。
命令解析12345678910diagnose debug flow filter addr x.x.x.x //过滤某个IP//diagnose debug flow show function-name enable //显示功能模块名称//diagnose debug console timestamp enable //显示时间戳//diagnose debug flow trace start 10 //开启debug flow trace并显示10条debug信息//diagnose debug enable //开启debug命令//diagnose debug flow trace stop //关闭debug flow trace//diagnose debug flow fi ...

锐捷路由器NAT配置
上网(源NAT)配置123456789101112131415161718192021222324252627配置端口基本信息interface GigabitEthernet 0/0 ip address 88.1.1.1 255.255.255.0 ip nat inside!interface GigabitEthernet 0/1 ip address 99.1.1.1 255.255.255.0 ip nat outside默认路由器配置ip route 0.0.0.0 0.0.0.0 99.1.1.2nat pool配置 (此处可以是outside接口地址,也可以不是,只要对端有回程路由网络可达即可)ip nat pool snatpool prefix-length 1 address 90.1.1.1 90.1.1.3 match interface GigabitEthernet 0/1 //同类型可添加多条,比如 address 90.2.2.1 90.2.2.3 match interface GigabitEthernet 0/2配置acl (指定内网上网源地 ...

华为交换机配置日志服务器
华为交换机配置远程syslog日志服务器1234info-center loghost source vlan254 //发送日志源地址info-center loghost 10.1.1.1 //指定远程syslog日志服务器info-center source default channel 2 log level debugging //发送的日子等级info-center enable

Cisco Packet Tracer
Download Cisco Packet Tracer Version 8.2.2Cisco Packet Tracer 是一款创新的模拟和可视化工具,可帮助您在桌面上练习网络、物联网和网络安全技能。
使用 Cisco Packet Tracer 可以:
将知识付诸实践
准备认证考试
提高面试技巧Packet Tracer 是思科网络学院大多数课程中用于活动和评估的重要学习工具。
软件下载自官方网站,保证官方原版无修改 如有密码,全站统一密码:obash
软件下载自官方网站,保证官方原版无修改 如有密码,全站统一密码:obash
Windows Desktop Version 8.2.2 English
64 Bit Download
32 Bit Download
Ubuntu Desktop Version 8.2.2 English
64 Bit Download
macOS Version 8.2.2 English
64 Bit Download ...

百度网盘不限速下载器
此次推荐两款,貌似是一样产品,可用性自行测试,留言反馈!
PanDownloadTuTDown软件下载
网盘下载
密码:obash
软件介绍
PanDownload是一款百度网盘不限速下载工具,致力于解决百度网盘限速等问题
内置百度网盘不限速接口,无需登录即可满速下载
支持各类资源搜索,可一键查找全网较新、较热资源
支持多账号登录、多账号文件管理,搜索,复制,移动
近期截图截图日期:2024-09-05
软件下载
网盘下载
密码:obash
软件介绍
本软件永久免费,严禁倒卖
内置不限速接口,无需登录即可满速下载
支持资源搜索,可一键查找全网较新、较热资源
支持多账号登录、多账号文件管理,搜索,复制,移动
近期截图截图日期:2024-09-05
网络厂商常用网站链接
思科 ciscoPA palo alto华为 huawei
ID
名称
地址
1.
华为企业业务官网
立即访问
2.
维保查询
立即访问
3.
软件镜像下载
立即访问
4.
设备生命周期
立即访问
5.
设备漏洞
立即访问
华三 h3c
ID
名称
地址
1.
华为企业业务官网
立即访问
2.
...
hexo+butterfly外挂标签 - 集合篇
https://akilar.top/posts/615e2dec/
NPM插件安装方案(推荐)源码修改方案
安装插件,在博客根目录[Blogroot]下打开终端,运行以下指令:1npm install hexo-butterfly-tag-plugins-plus --save
考虑到hexo自带的markdown渲染插件hexo-renderer-marked与外挂标签语法的兼容性较差,建议您将其替换成hexo-renderer-kramed12npm uninstall hexo-renderer-marked --savenpm install hexo-renderer-kramed --save
添加配置信息,以下为写法示例在站点配置文件_config.yml或者主题配置文件_config.butterfly.yml中添加123456789101112131415# tag-plugins-plus# see https://akilar.top/posts/615e2dec/tag_plugins: enable: true # 开关 priority: 5 #过滤器 ...

hexo+butterfly思维导图
安装markmap使用方式github链接1234567方式1: pnpm add hexo-markmap -D方式2: npm install hexo-markmap --save-dev方式3: yarn add hexo-markmap --dev方式4:cnpm install hexo-markmap --save-dev12345{% markmap height [depth] %}- Markdown- Syntax{% endmarkmap %}
height:思维导图画布高度
depth:可选,指定后,自动折叠层级大于depth
depth我测试不好使,用 <!-- fold--> 解决自动折叠问题123- 例子(不折叠) - 这里不折叠 - 这里是折叠的 <!-- fold -->
github链接:https://github.com/maxchang3/hexo-markmap
效果图

路由协议思维导图
路由协议思维导图
跳转本站路由协议-RIP
跳转本站路由协议-OSPF
跳转本站路由协议-EIGRP
跳转本站路由协议-IS-IS
跳转本站路由协议-RIPng
跳转本站路由协议-BGP
跳转本站路由协议-EBGP
跳转本站路由协议-EGP